

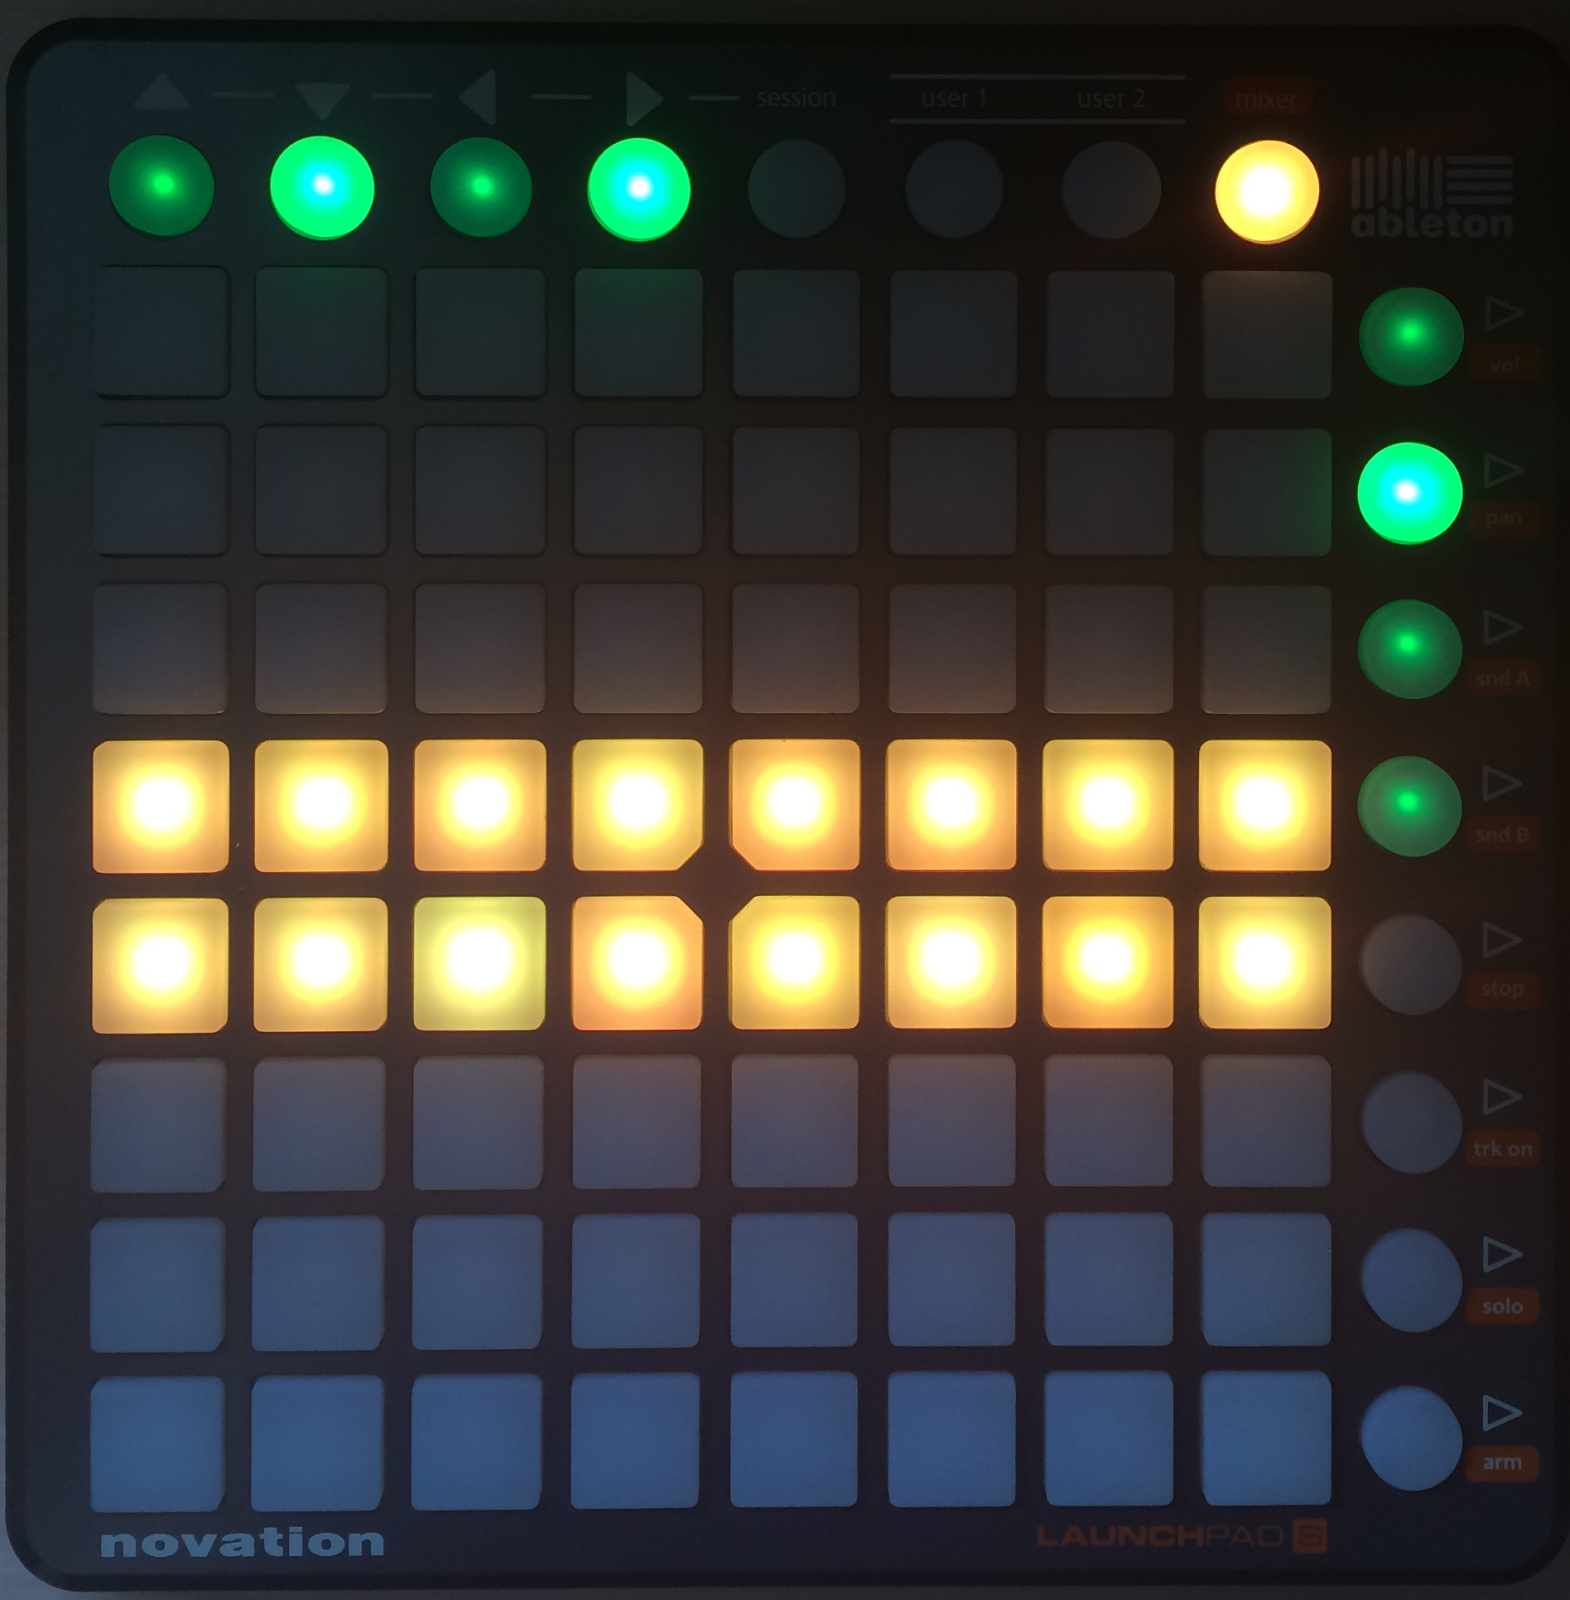
The mixer overview

This is the view displayed when pressing the Mixer button. It provides an overview of the main mixing controls in Live.
Each vertical column represents an audio or MIDI track on session view in ableton.

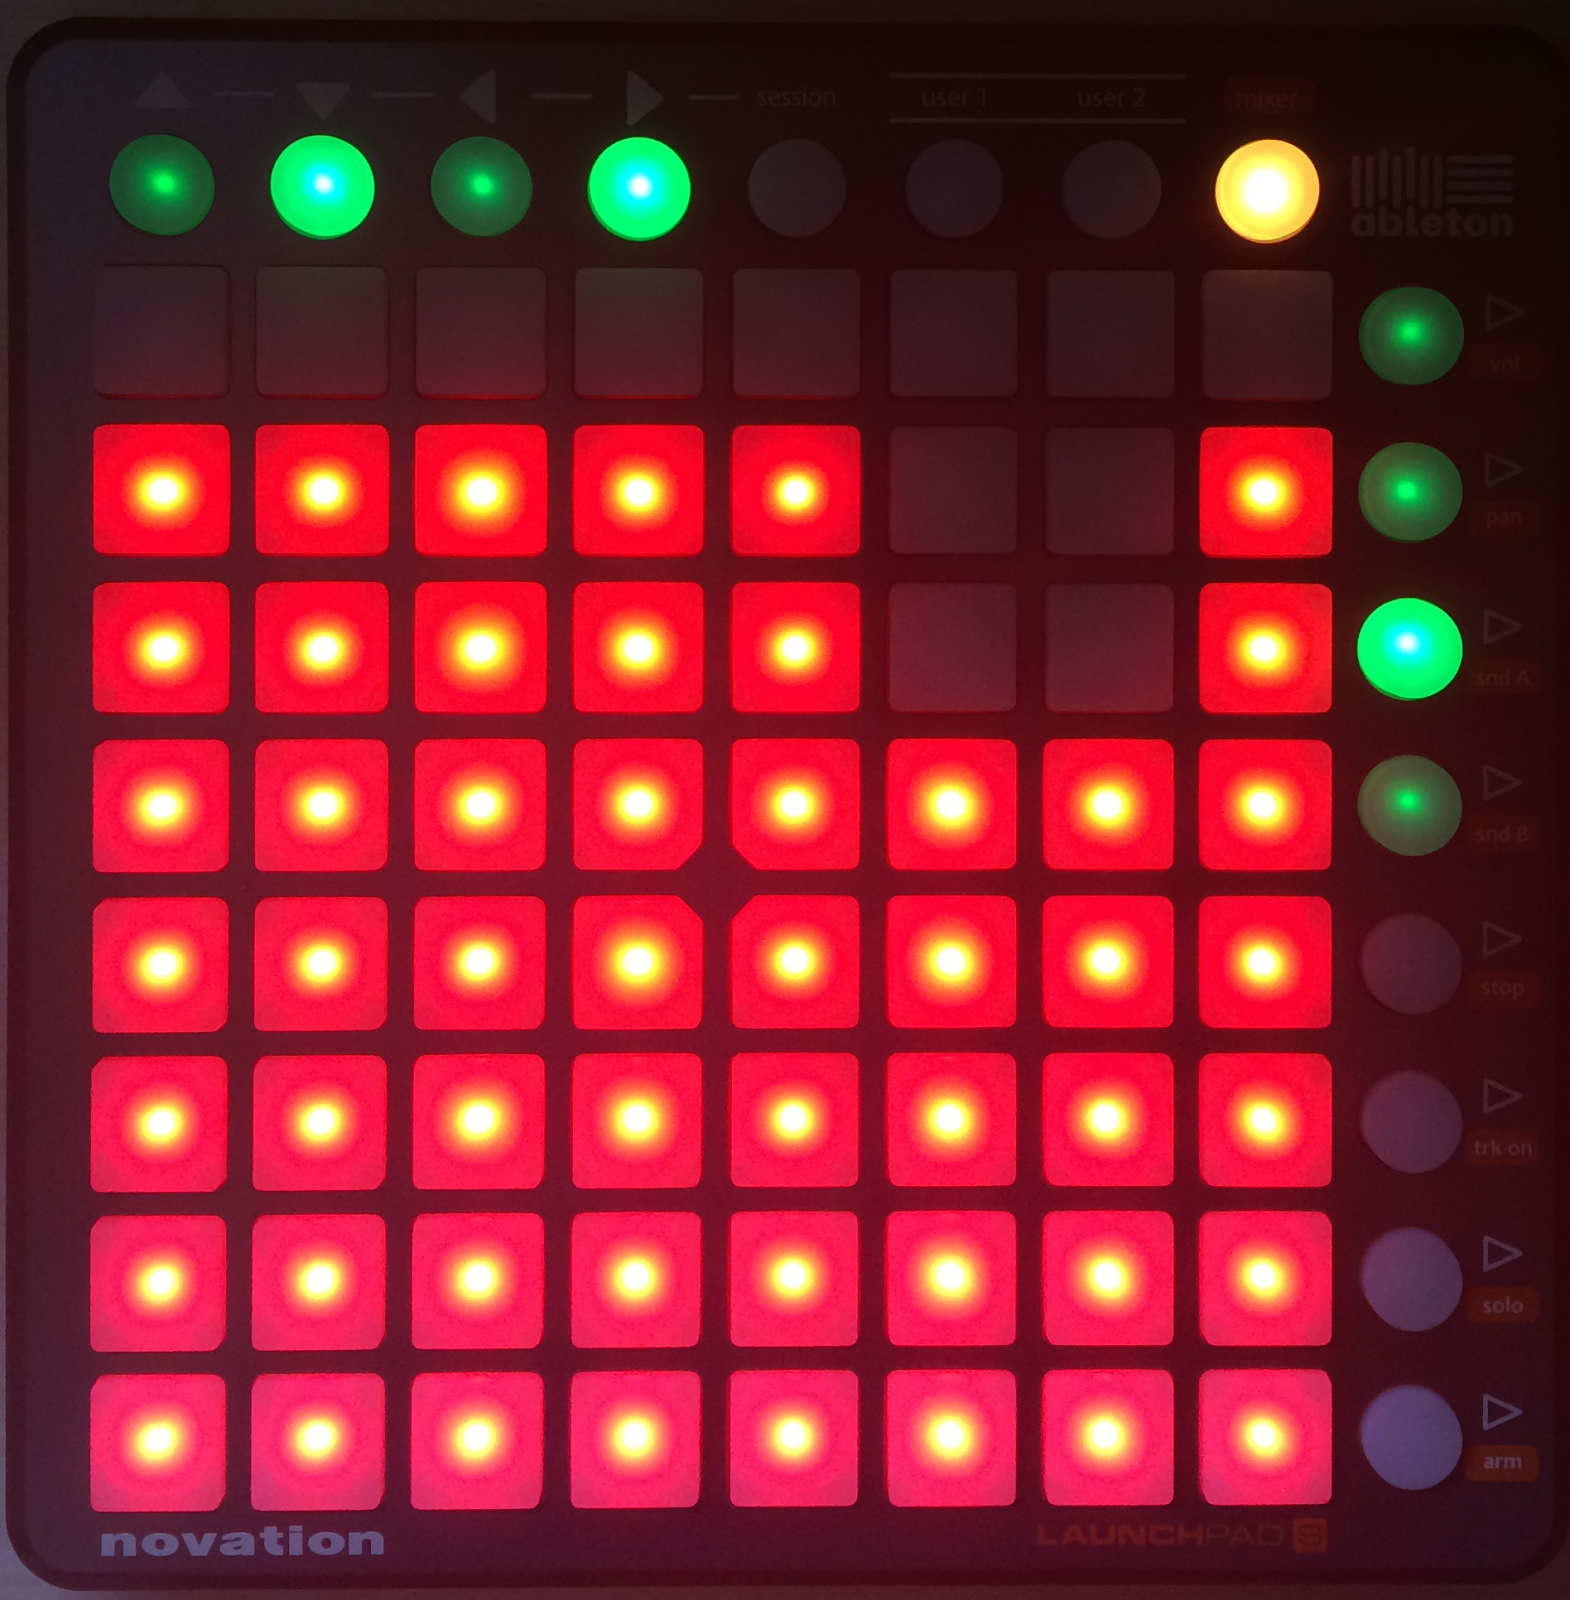
- if the parameter is at its default value, the pad is dimmed
- if the parameter is NOT at its default value, the pad is fully lit. Hitting the pad will instantly set the parameter to its default value (0 dB for volume, center for pan, 0 for sends).

- pads in the ”stop” row will stop the clip currently playing in this track
- pads in the ”trk on” row will mute this track (the pads turn off)
- pads in the ”solo” row will solo this track
- pads in the ”arm” row will arm this track

- the ”stop” button will stop all clips currently playing
- the ”trk on” button will mute all tracks (all pads turn off)
- the ”solo” button will un-solo all soloed tracks
- the ”arm” button will un-arm all armed tracks

-The first button will open the Volume page
-The second button will open the Pan page
-The third button will open the Sends A page
-The fourth button will open the Sends B page
Here is an explanation on how the designated pages work:
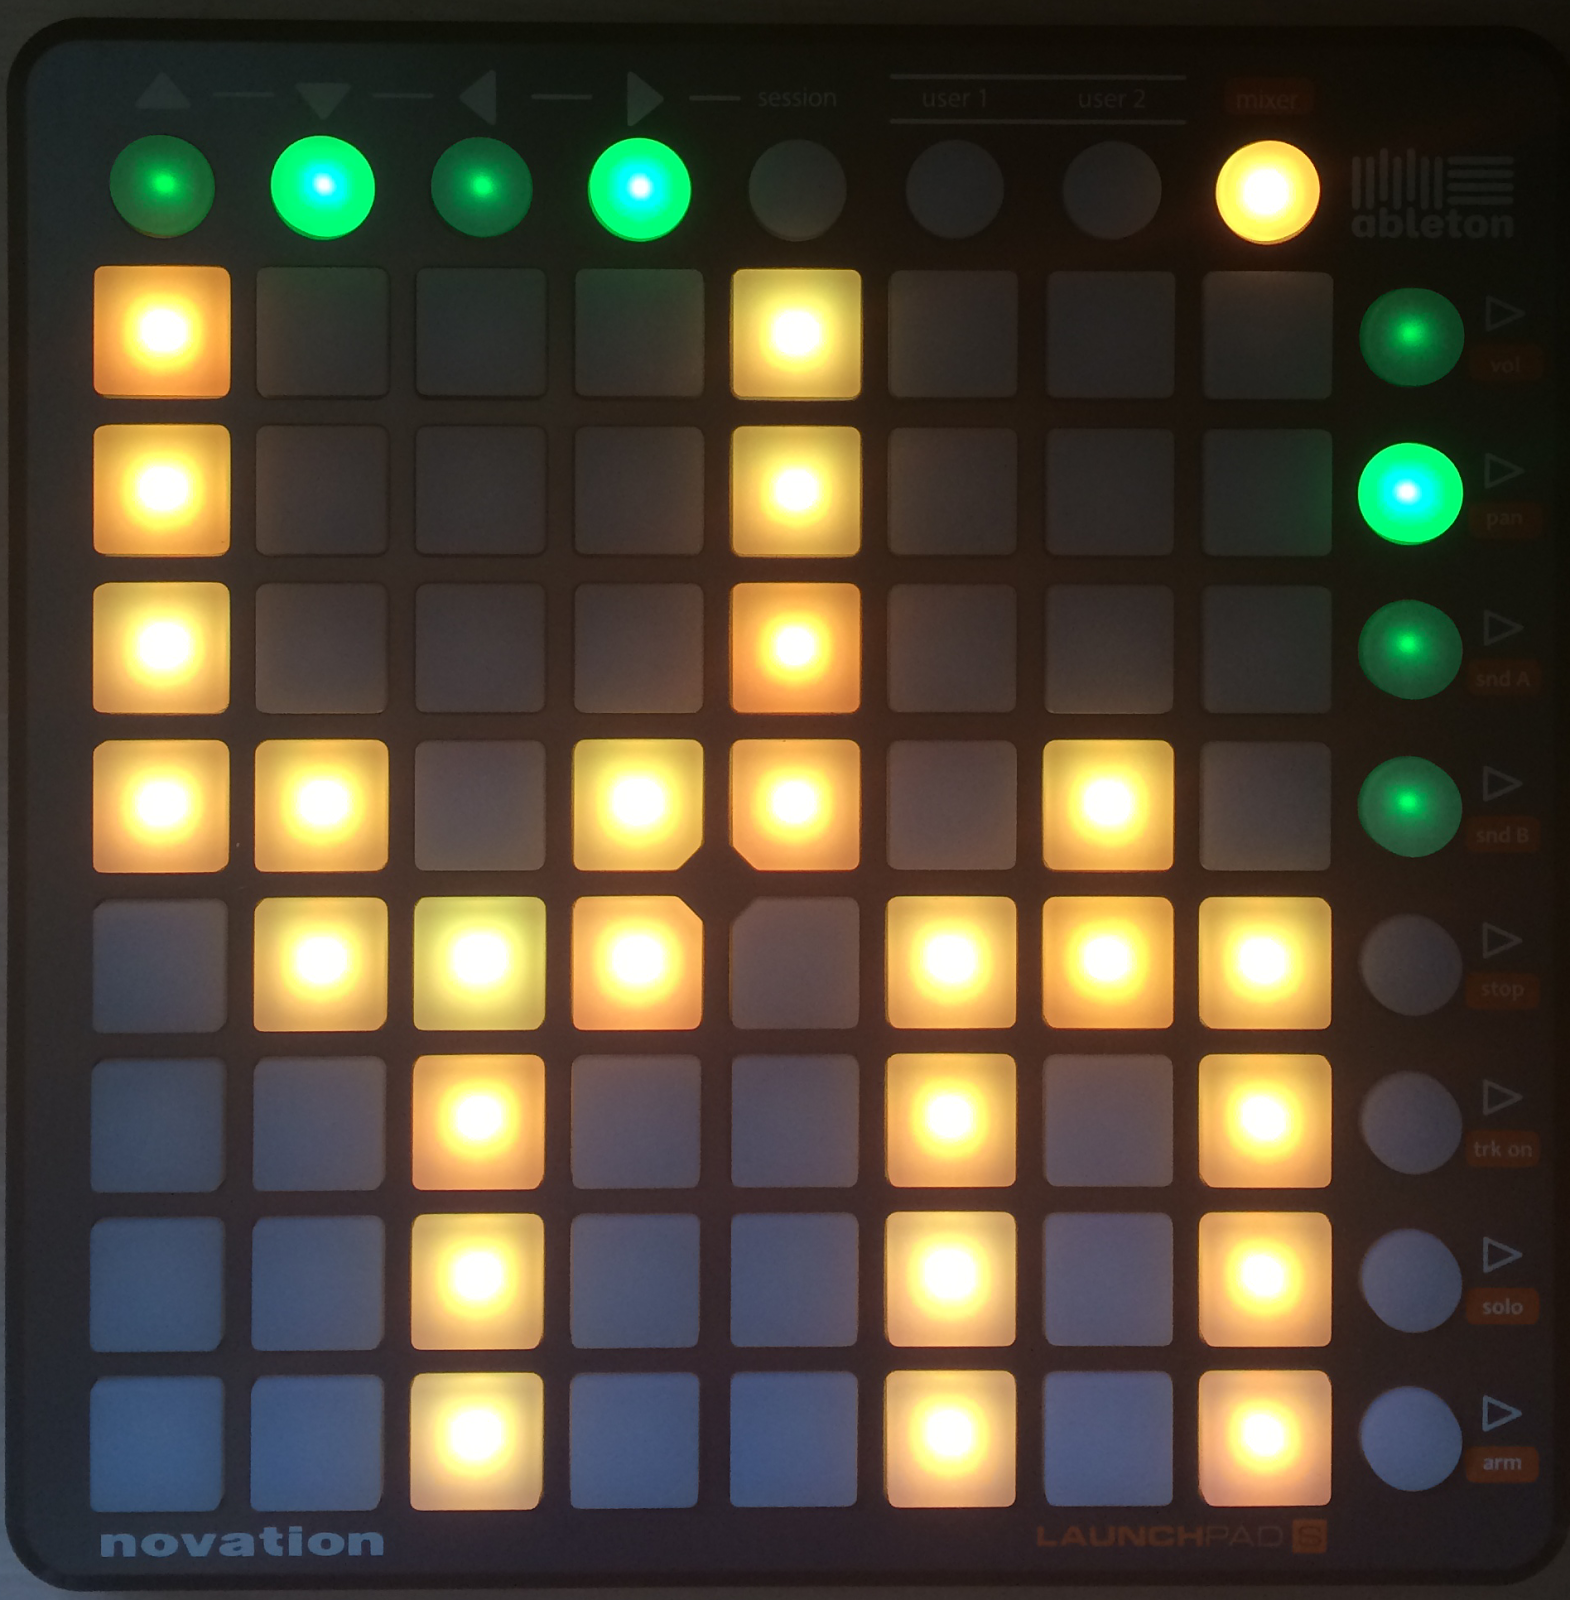
The Volume page

Pressing the first side-button (vol) will take you to the volume page.

Each column corresponds to a track and all eight pads of a column turn into a track volume ”fader”. The pads have the following values in dB, from bottom to top: -inf, -48, -24, -18, -12, -6, 0, +6.
All pads below (and including) the selected value light up in full brightness to indicate the ”fader position.”
The Pan page
Pressing the the second side-button (pan) will take you to the Pan page.

In the Pan page, all eight pads of a column turn into a track panorama ”knob” for the selected track, with left at the bottom and right at the top. The pads have the following values, from bottom to top: 50L, 30L, 15L, center, center, 15R, 30R, 50R. The pan control is centered when the two pads in the middle are fully lit.
The Sends pages
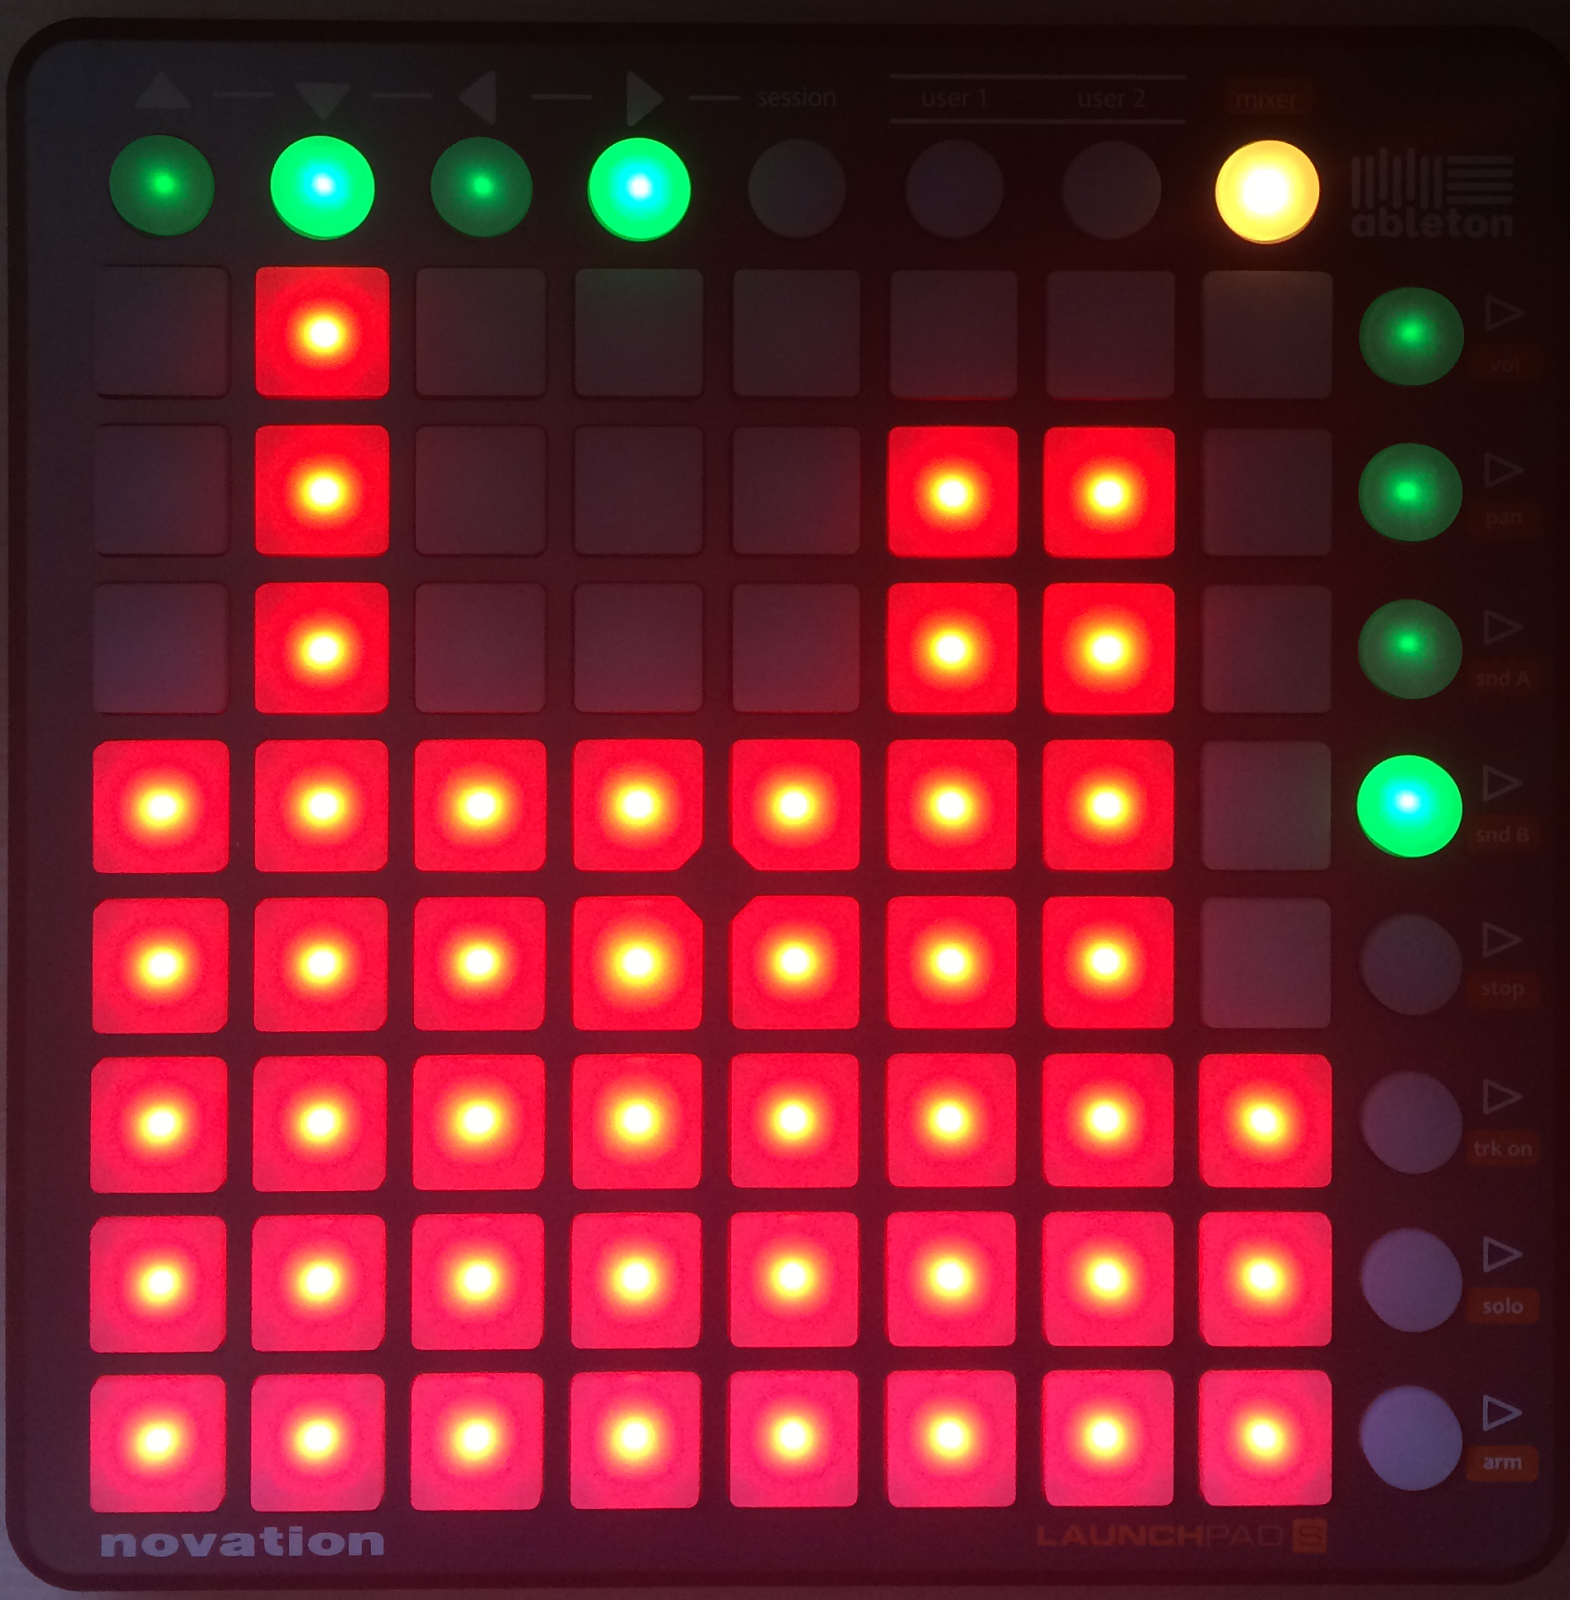
Pressing the the third and fourth side-buttons (Snd A and Snd B) will take you to the Sends pages.
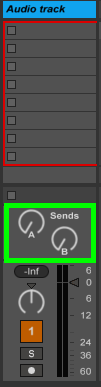
To set the sends, you can use the two Return tracks next to the Master track in Ableton, putting effect racks or single effects on them:

Now you know the basics of the Mixer mode and what it's used for!
Here is a video-tutorial by Novation explaining the Mixer mode basics:
huh
ReplyDelete